How to install an SSL Manually in cPanel or Plesk
Note: This guide is for 3rd party SSL certificates or certificates already configured on a different server. If you have just purchased an SSL through us,
click here for a guide to install the SSL.
You can follow this guide to manually install an SSL Certificate on your hosting. Most of our hosting is cPanel, so if you're not sure what platform you use we'd recommend starting there.
cPanel Guides
The general steps to issuing and installing a certificate are as follows:
Generate CSR and Private Key in cPanel / WHM
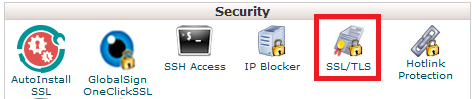
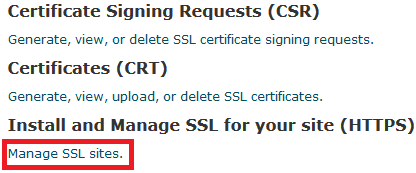
Step 1 - Log into cPanel for the relevant domain and click on the SSL/TLS icon.
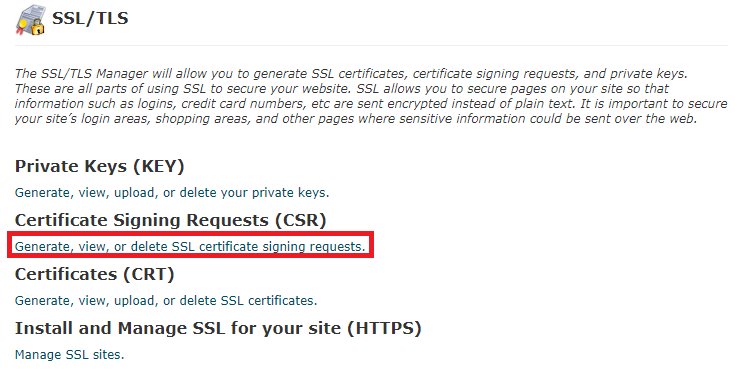
Step 2 - Click on Generate, view or delete SSL certificate signing requests.
Step 3 - Enter in the CSR details and click Generate down the bottom of the page.
Leave the Key Size as 2,048 bits. Ensure you provide accurate information as the details are reviewed by the Certificate Authority.
- Domains - Provide the Fully Qualified Domain Name(s) that you wish to secure. If you are generating a wildcard certificate, enter *.domain.com
- City - City of the associated business or site owner.
- State - State of the associated business / site owner. Do not abbreviate this (Use New South Wales instead of NSW).
- Country - Country of associated business / site owner.
- Company / Organisation Name - This should be your business or organisation name. If this is for a personal site, then just put your site's name.
- Company Division - This is generally used to identify which company / business department or team is responsible. The default is 'IT'.
- Email Address - Email contact for SSL configuration. This can be a distribution list.
- Passphrase - This is an optional field, only use it if your Certificate Authority requires it.
- Description - This is also an optional field, feel free to include a description of the SSL certificate.
Step 4 - Take note of the CSR and Private Key that are displayed on the next page, and store them in a safe place. These will be needed to generate your SSL Certificate.

Step 5 - You will need to provide this CSR to the company that you purchased the SSL from. If the SSL is with us, you can use this guide to provide us the CSR.
How to Install an SSL Manually in cPanel
Before you start: Your SSL provider may provide you with SSL files that look something like this:
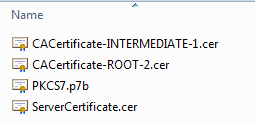
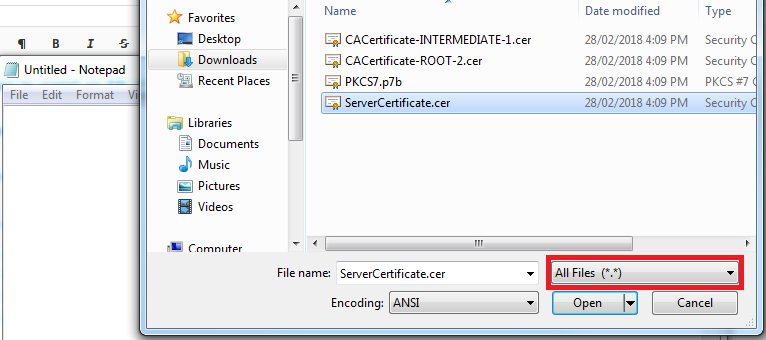
The ServerCertificate.cer file has the SSL code need for manual install. You can use a text editor like Notepad to open the file (or TextEdit on Mac). Make sure you select All Files (*) to show the .cer files when you open them.
Step 1 - Log into cPanel and click on the SSL/TLS icon.
Step 2 - Click on Manage SSL Sites.
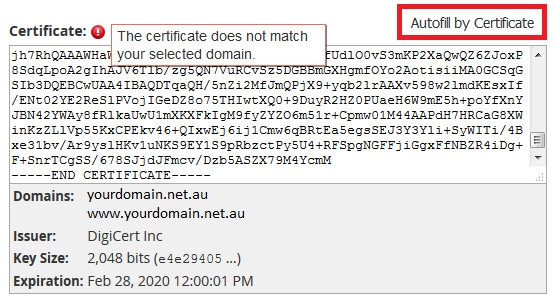
Step 3 - In the box marked Certificate (CRT), add the certificate text, then click Autofill by Certificate. Make sure to remove any spaces after END CERTIFICATE-----.

Step 4 - If the Private Key (KEY) or Certificate Authority Bundle: (CABUNDLE) fields don't autofill, check the other certificate files for them (these should be the same format as the CRT) otherwise ask your SSL provider for them. You would have generated the Private Key at the same time as the Certificate Signing Request, and should have stored it in a save location.
Step 5 - Click Install Certificate.

After all the processing steps are completed, your SSL should now be installed. In order to confirm, you can use this external tool. If your site is still showing "Not Secure" or loads without a padlock, you may be serving Mixed Content.


In order to resolve Mixed Content warnings you can either use this guide or contact your website developer.
How to Install an SSL Manually in WHM
Before you start: Your SSL provider may provide you with SSL files that look something like this:
The ServerCertificate.cer file has the SSL code need for manual install. You can use a text editor like Notepad to open the file (or TextEdit on Mac). Make sure you select All Files (*) to show the .cer files when you open them.
Step 1 - Log into WHM and click on Install an SSL Certificate on a Domain.

Step 2 - In the box marked Certificate, add the certificate text, then click Autofill by Certificate. Make sure to remove any spaces after END CERTIFICATE-----.
Step 3 - If the Private Key (KEY) or Certificate Authority Bundle: (CABUNDLE) fields don't autofill, check the other certificate files for them (should be the same format as the CRT) otherwise ask your SSL provider for them.
Step 4 - Click Install.

After all the processing steps are completed, your SSL should now be installed. In order to confirm, you can use this external tool. If your site is still showing "Not Secure" or loads without a padlock, you may be serving Mixed Content.
In order to resolve Mixed Content warnings you can either use this guide or contact your website developer.
Plesk Guides
The general steps to issuing and installing a certificate are as follows:
Generate CSR & Private Key in Plesk
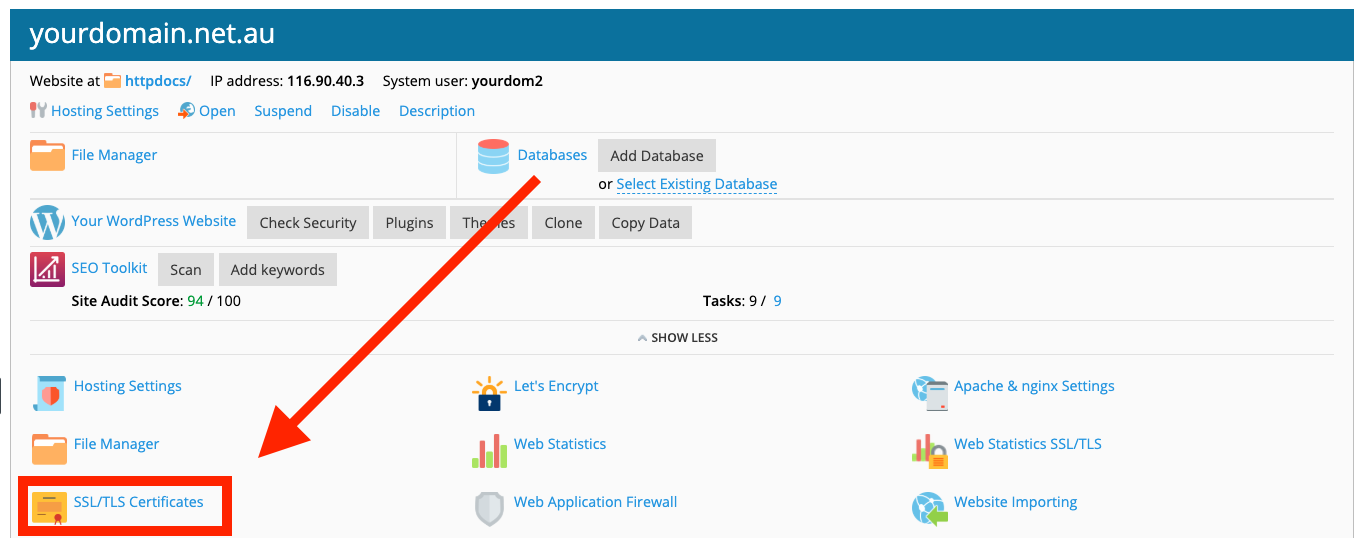
Step 1 - Log into Plesk and click on SSL/TLS Certificates.
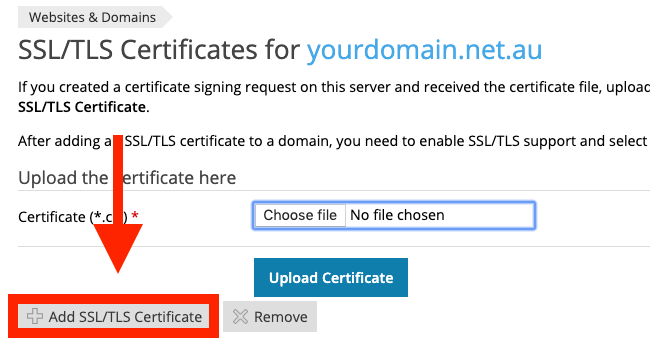
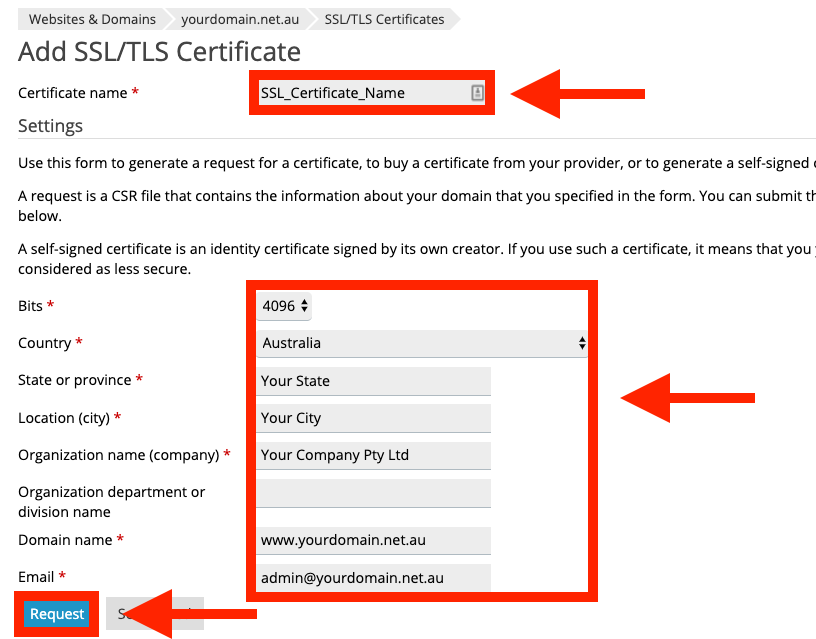
Step 2 - Click on Add SSL/TLS Certificate.
Step 3 - Input the Certificate name (this is for your reference) and the details for your certificate, then click Request.
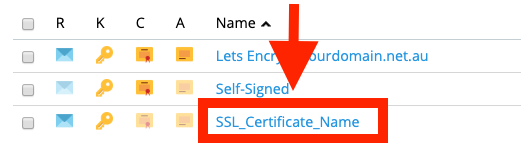
Step 4 - Find the SSL Name that you have just created and click on it.
Step 5 - You will need to provide this CSR to the company that you purchased the SSL from. If the SSL is with us, you can use this guide to provide us the CSR.
Manually Install a SSL certificate in Plesk
Before you start: Your SSL provider may provide you with SSL files that look something like this:
The ServerCertificate.cer file has the SSL code need for manual install. You can use a text editor like Notepad to open the file (or TextEdit on Mac). Make sure you select All Files (*) to show the .cer files when you open them.
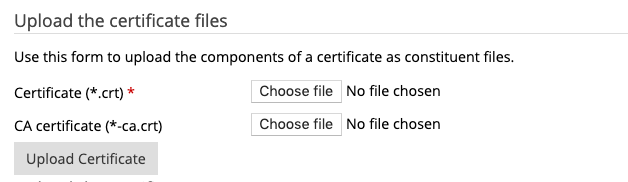
Step 1 - Once you have the certificate files, log back into Plesk, navigate to SSL/TLS Certificates and click on the SSL instance you had created previously.
Step 2 - Upload the Certificate and the CA Certificate (or Intermediary Certificate).
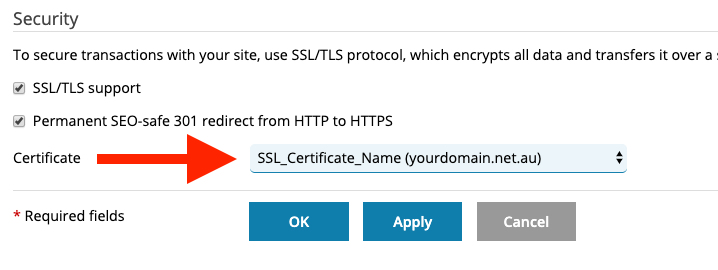
Step 3 - Go back to the home page of Plesk and click on Hosting Settings.
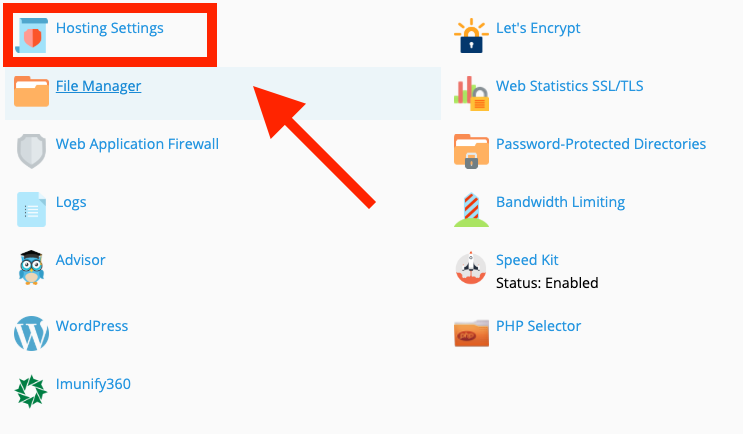
Step 4 - Here, ensure that the Certificate selected is the one you created before. Click OK to apply your changes.
Note: You may also want to use the HTTP to HTTPS redirect to force the use of the SSL. This may stop some HTTP resources loading on your site, depending on how it was developed. If this happens, disable the redirect temporarily and contact your developer.
After all the processing steps are completed, your SSL should now be installed. In order to confirm, you can use this external tool. If your site is still showing "Not Secure" or loads without a padlock, you may be serving Mixed Content.
In order to check Mixed Content you can use this guide, but to resolve it you will need to contact your website developer.